 Charlie Smurthwaite
.
August 16, 2023
.
All EV Vehicles

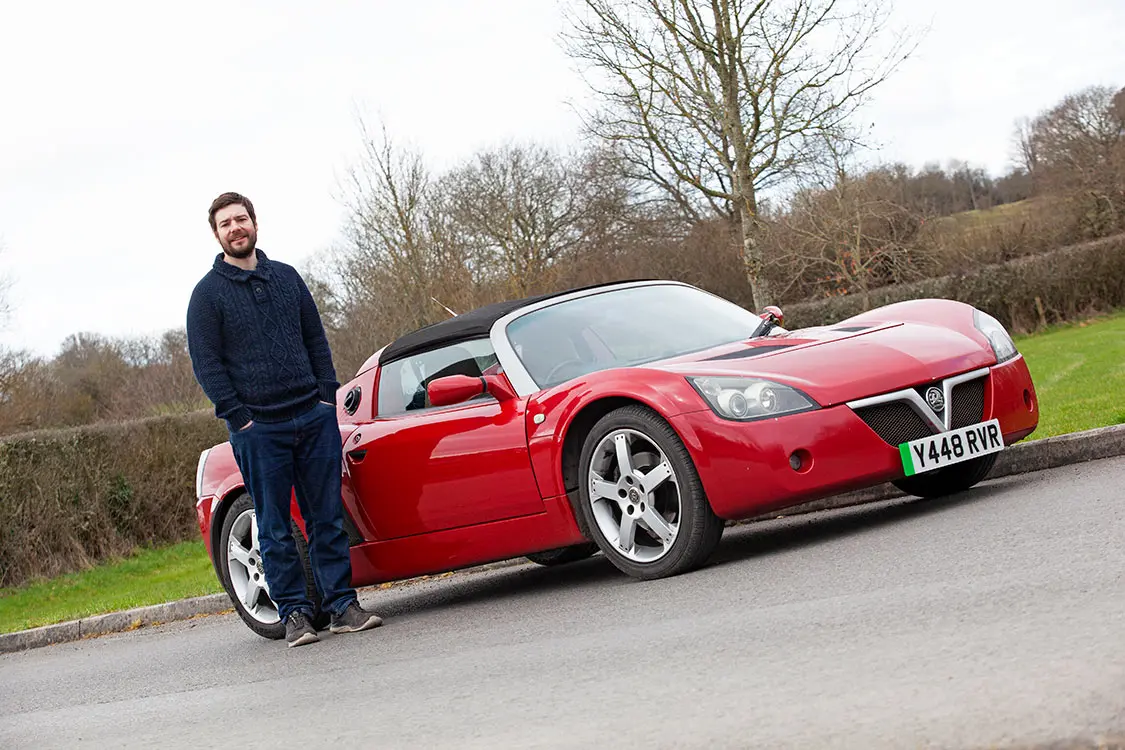
As a lover of cars and electronics, I’ve long dreamed of building a lightweight electric sports car. My search for a suitable vehicle led me to the Vauxhall VX220, also known as an Opel Speedster in other markets. Sharing much of its design with the Lotus Elise, it represents one of the lightest modern production cars available and a perfect starting point. My goal for this project was to minimize cost and weight while maximizing performance. I also wanted to use as many open-source components as possible and share my progress with the community. The result is exactly what I hoped for—an electric vehicle perfectly suited to the enjoyment of winding British backroads.
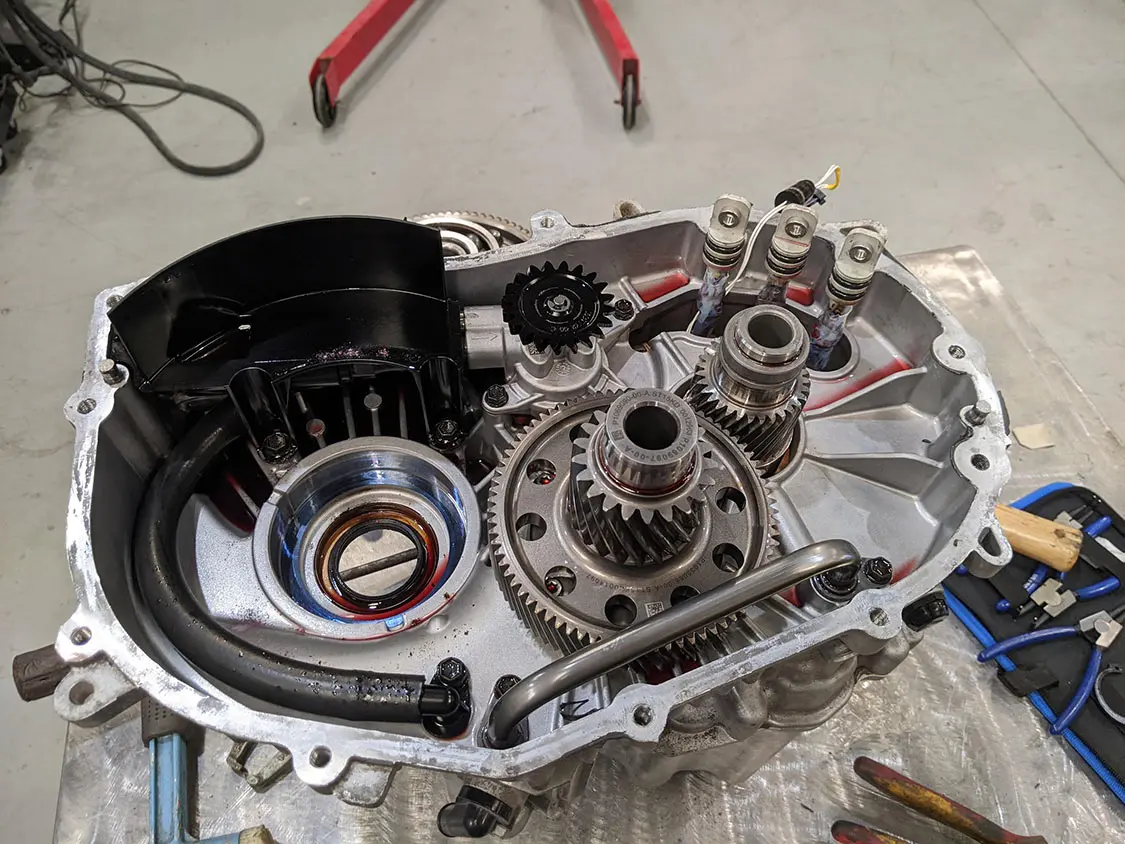
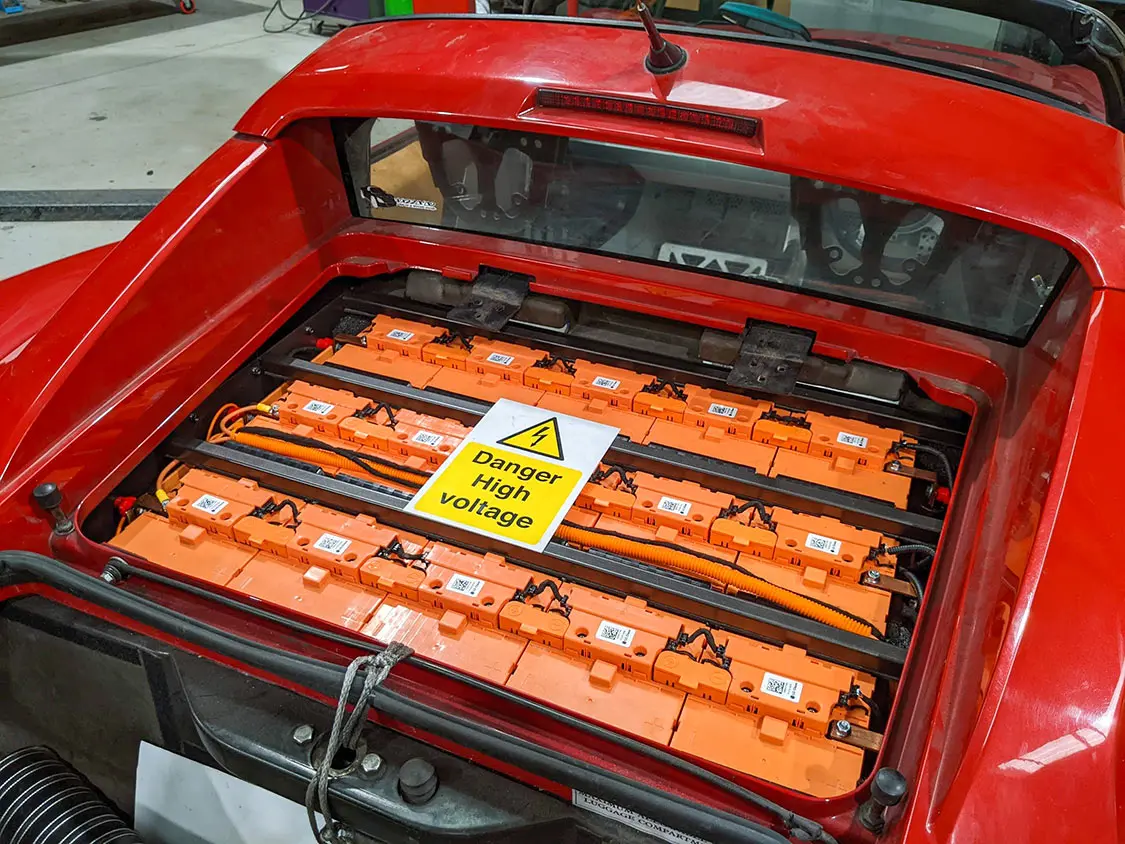
I chose a salvaged Tesla Small Rear Drive Unit for the project. This unit integrates an inverter, an AC induction motor, a single-speed gearbox, and a differential into a unit weighing only 90kg. With a peak power output of 220kW (295hp), this unit can produce twice as much power as the original 2.2L gas engine fitted by Vauxhall and works very well in place of the original gearbox. The drive unit is controlled by the open-source “Openinverter” logic board. The 300V battery pack is built using LG Chem modules salvaged from a hybrid vehicle to keep the weight to a minimum. It has a capacity of 19 kWh and weighs in at just under 400 pounds.
The final major component is the charger. This unit from Ovartech includes a 6.6kW AC charger, allowing charging from any AC charge point and powerful enough to charge the small battery pack in under three hours. It also integrated a 1.5kW DC-DC converter, providing plenty of power for the 12V accessories.

I opted for a single cooling loop to keep cooling simple, and I modified the original radiator to accept the smaller pipework needed for EV components. To heat the interior, I replaced the original heating matrix with a 3kW high-voltage TC heater from Zero EV (now Fellten).
As an electronics enthusiast, I wanted to design some components myself. This allowed me great flexibility in choosing parts, as I could write my code to integrate them. In particular, this allowed me to utilize the BMS slave modules included with the battery modules. This battery management system, which keeps the batteries balanced and all voltages and temperatures within safe limits, as well as the vehicle control module, which manages the charger, heater, and some of the dash controls, were both designed specifically for this vehicle based on the Raspberry Pi Pico.

The most challenging part of this build was the design of the battery box. After buying the battery modules and measuring everything up, it became clear that space was extremely limited. However, I wanted to place all the high-voltage switchgear inside the box to prioritize safety. The result was weeks of staring at CAD mockups before eventually reaching a design that would work.
The Tesla drive unit is mounted in reverse, and as a consequence, it has to run in reverse. This isn’t a problem for an electric motor, nor for the Openinverter controller. However, the drive unit also contains an oil pump driven directly by the motor, which will not function in reverse. To resolve this, I needed to disassemble the drive unit and modify the internals of the oil pump to allow it to run this way. Fortunately, instructions are available, but the process requires precision, and there would be no second chances to get it right.
Otherwise, the whole conversion was straightforward and only took six months in my spare time. Before you go on the same journey, consider spending time on online forums and making friends in the conversion community before jumping into your project. One of the best parts of working on this has been the support from the community. Then plan your vehicle space carefully, and you should be ready! In a small car like mine, every square inch can be crucial. Measure everything twice and build with cardboard before spending money on parts.

My best tip would be to choose a simple car. A key reason for selecting the VX220 was the lack of existing electrical systems, similar to a classic car. Air conditioning, power steering, and electronic displays will all add complexity to the project. You will need a lot of colorful wires. Don’t underestimate how many colors of low-voltage wire you will want to use. Oh, the last tip, consider a heat-shrink label printer. Heat-shrink labels make it much easier to identify wires later.
Owner:
Charlie Smurthwaite
2001 Vauxhall VX220
Dorset, England
Motor:
Tesla SDU on custom mountings
Inverter:
Openinverter Tesla SDU controller
Traction battery:
Homemade with LG Chem 16S packs (96s2p total)
Other:
DIY central controller linking inverter, charger, BMS slaves, and OEM Vauxhall
gauges
Words by Chun Lim
Photos by Jerome Andre
Once a devoted Mazda RX8 owner, I poured my heart and soul into that car. I cherished its perfect fit, exceptional handling, and thrilling revs. However, as much as I loved the 2004 GT RX8, it became clear that its maintenance costs and fuel efficiency were far from ideal. Eventually, I had to say goodbye and embark on a new automotive adventure. For a while, I settled for leasing practical people movers while awaiting the perfect opportunity.
However, when the announcement of the Tesla Model 3 arrived in 2016, I wasted no time in placing a deposit. This was a revolution in the making. Having experienced the pleasure of riding in my friends’ Model S and Model X, I was ready to embrace the electric revolution. While the RX8 excelled in its agility, it lacked the raw torque that Teslas offered. The thrill of pressing down the “Go!” pedal in a Tesla was simply irresistible. Furthermore, our home already boasted solar panels, so transitioning from 17 mpg to virtually free charging at home felt like a leap toward a greener future. Exciting prospects lay ahead. I promptly ordered a Multicoat Red Model 3, reminiscent of my beloved “Kasumi” (the RX8). I fondly named the Tesla “Ivy” after Poison Ivy, the environmentally conscious Batman character with her fiery red hair.
Initially, I had no intentions of modifying Ivy. For the first year, simply representing Tesla and enjoying the 3’s swift acceleration satisfied me. However, a significant change occurred here in Las Vegas. Teslas soon flooded the streets, transforming chance encounters with another on the road into a daily occurrence. In 2018, the year I received My Long Range RWD Model 3, stumbling upon a couple of Teslas each day was cause for a friendly wave.
But fast forward to 2023, and it feels unusual not to see at least three or four at every stoplight. Teslas have become the most popular cars in town, which I consider a fantastic development both for Tesla’s business and the environment. Nevertheless, as a former die-hard car modifier, I felt that Ivy had blended into the crowd, much like the army of Priuses a decade ago. It seemed as though I was wearing the same outfit as everyone else, failing to make a distinctive statement as an owner. I had what could be described as the current iPhone of cars.
The most crucial aspect of this endeavor was ensuring that it was more than a mere collection of random parts. If I was going to modify my Tesla, I wanted a complete and cohesive aesthetic that was bold, meticulously planned, and undeniably tailored to my taste. Anyone can slap gunmetal wheels and a chrome delete onto their car and call it a build. I wanted something beyond the usual safe additions to enhance the appearance. I craved a unique vibe that exuded enthusiasm, remained clean and individualistic, and turned heads (hopefully in a positive manner).
Like many enthusiasts, I began my journey with wheels. I spent months tirelessly searching for the perfect set. I stumbled upon a wheel by Signature that caught my eye. I collaborated with the company’s representative to fine-tune the fitment and explore the possibility of a directional twist. Although Signature couldn’t fabricate it itself, its partner company, BC Forged, came to the rescue.
The result: 20-inch HCA210S wheels with eye-catching Royal Gold accents and a polished lip. The golden hue complemented the car’s natural color, while the polished lip accentuated the chrome trim. I wanted to showcase the chrome in a cool and distinctive way rather than following the trend of deleting it and opting for a dark matte finish that has been popular for years.
The final wheel specifications were 20×9 inches with 255/35R20 Michelin Pilot Sport 4S tires up front, and 20×10 inches with 295/30R20 4S tires in the rear. To achieve the desired flush fitment, I chose BC Racing Comfort Coilovers with a 2-inch drop. I leaned toward a more comfortable suspension setup rather than a rigid performance-oriented one. I also added Unplugged Performance camber arms to ensure the ability to make alignment adjustments if necessary.
For the exterior, I selected a bold and uncommon shade of red, the KPMF Mythos Matte Red wrap, and combined it with a body kit from Artisan Spirits, which elegantly accentuated the car’s natural curves. To complete the ensemble, I added a spoiler. I also wrapped the body kit, except for a few strategically exposed carbon fiber details. I find it unsightly when people add a carbon kit to the bottom of a car without matching the paint or wrap. It gives an unfinished impression, and I wanted every element to be harmonious.
Satisfied with the exterior, I turned my attention to the interior to achieve a comprehensive look. I had various components wrapped using the same vinyl from the exterior, ensuring that the wood dash, center console, and parts of the steering wheel perfectly matched the car’s exterior appearance. Red trim lighting, footwell lights, and puddle lights were added to maintain the consistent theme. Finally, to enhance functionality, I installed a screen swivel and a back seat control panel.
It seemed as though I was wearing the same outfit as everyone else, failing to make a distinctive statement as an owner.
This is my current build—a testament to my passion and dedication. While I have plans to add some smaller details, such as painting the calipers and upgrading the rotors, for the most part, I consider the modification complete. I love driving her even more now and the amount of attention she gets is great. I’ve had people pace me on the highway just to give me a thumbs up. I’ve taken her to car meets and see people filing or staring at her. And while it was a long expensive process, it was a great build experience and love having been through it!
Owner:
Chun Lim
EXTERIOR MODIFICATIONS:
Wrap: KPMF Mythos Matte Red
Body Kit: Artisan Spirits
Wheel Set: BC Forged HCA210S, Front: 20×9 inches, Rear: 20×10 inches
Tires: Michelin Pilot Sport 4S, Front: 255/35R20, Rear: 295/30R20
SUSPENSION:
Coilovers: BC Racing Comfort – 2-inch drop for flush fitment
Camber Arms: Unplugged Performance
INTERIOR MODIFICATIONS:
Wood dash, center console, and steering wheel wrapped to match exterior
Red trim lighting, Footwell lights, Puddle lights, Screen swivel, Back seat control panel
We use cookies to enhance your browsing experience, serve personalized ads or content, and analyze our traffic. By clicking "Accept All", you consent to our use of cookies. Visit our Cookie Policy for more info.
Notifications
Share Link